How to Set Up and Use Remote Desktop Connection in Windows 10
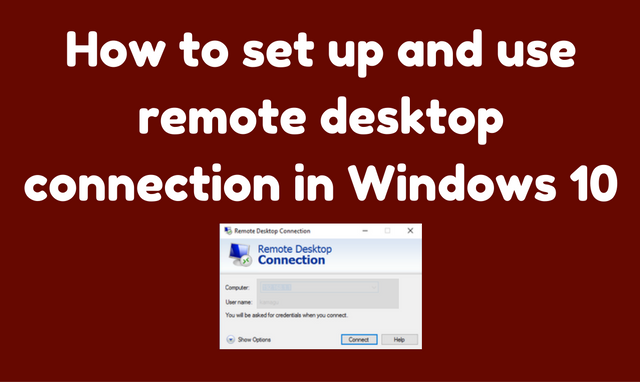
If you are using a Windows system and want to connect to another PC, remote desktop connection is the best way to go.
You might want to share/exchange files, photos or whatever. Or you might want to debug another computer from your own computer.
In any case, Windows makes it easy with the remote desktop option.
Here’s how to set up the remote desktop connection
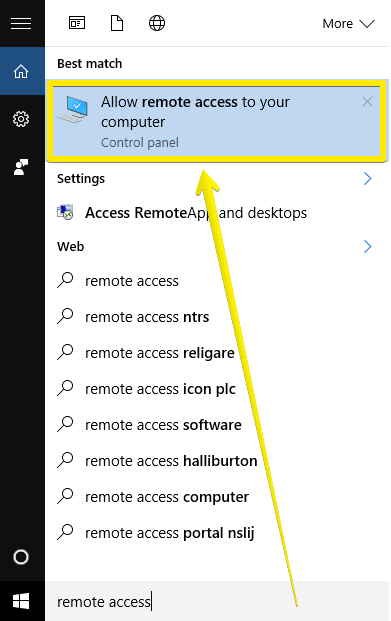
First you should allow remote access to your computer. In order to do so, type “remote access” in Cortana search and click on “Allow remote access to your computer”.
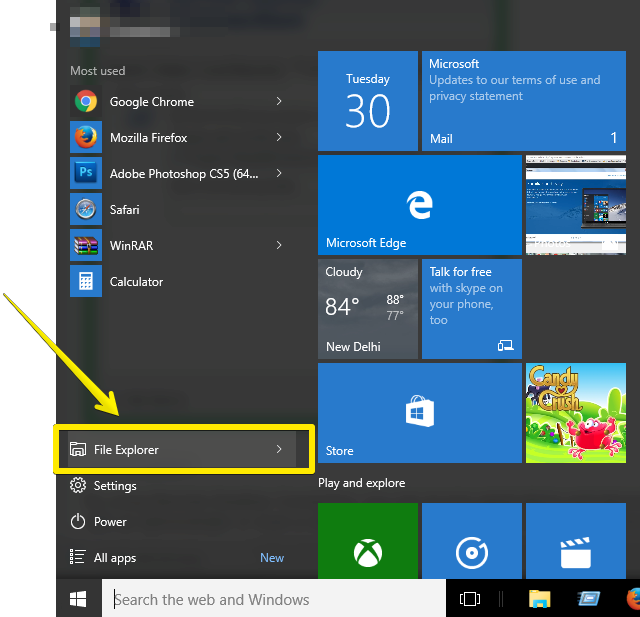
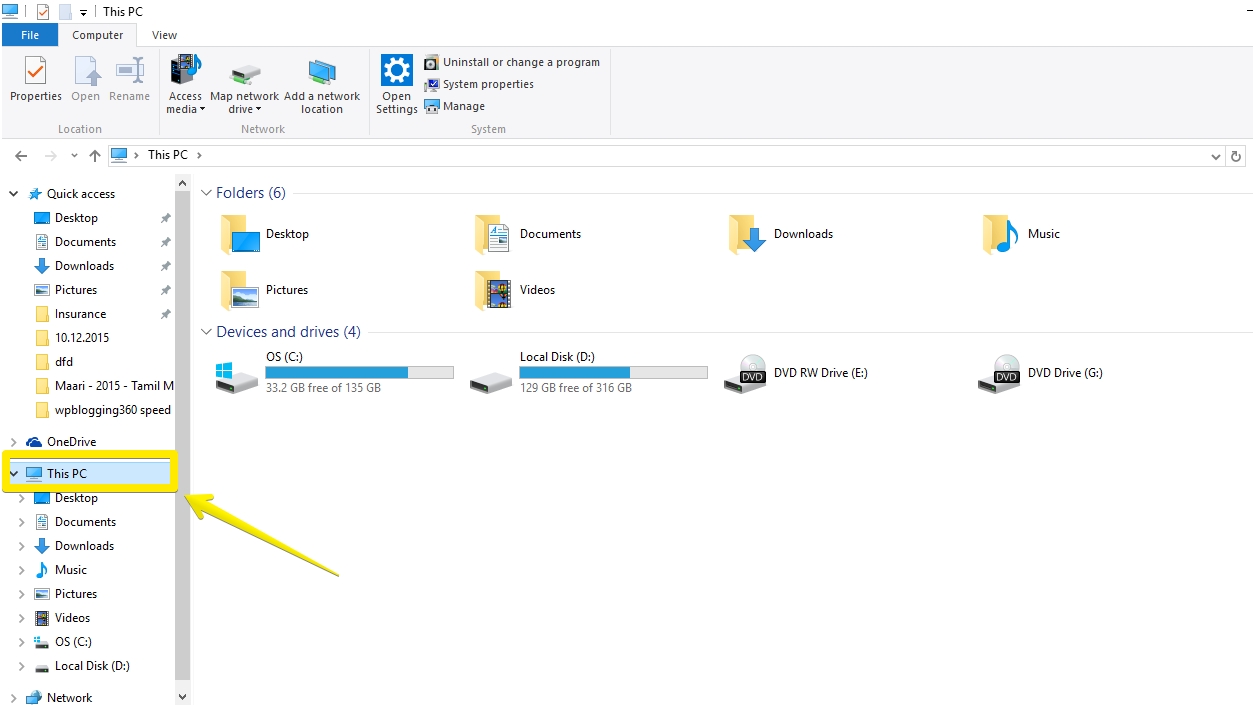
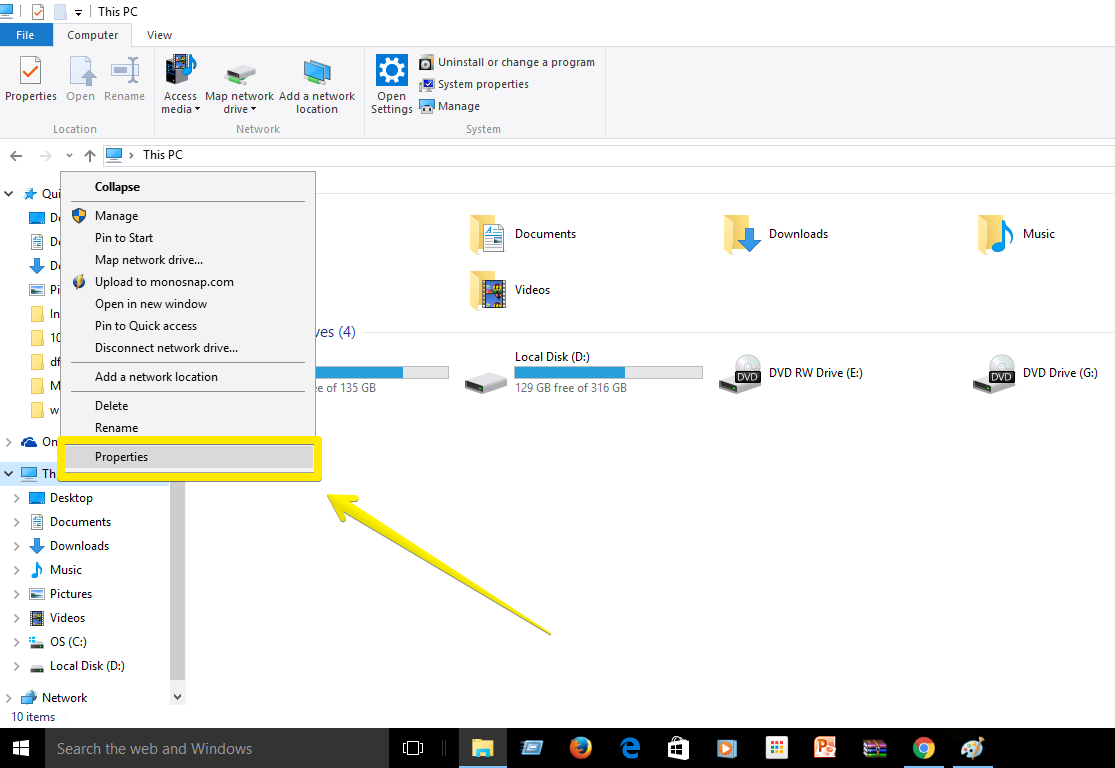
You can also reach this setting by going to File Explorer > find This PC > right click > select Properties > click on Remote tab
Now, select “Allow remote connections to this computer” and un-tick “Only allow connections from computers running Remote Desktop with Network Level Authentication”.
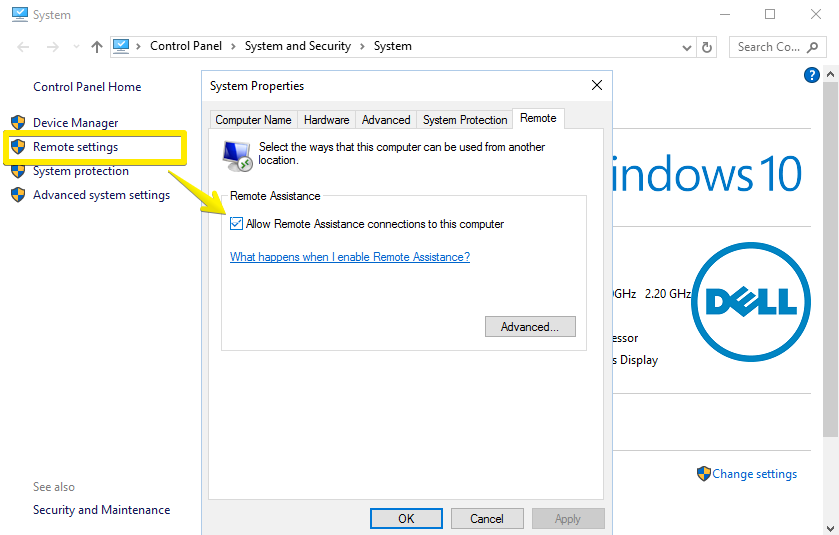
You have now enabled remote connections on your computer. Make sure the same is done on the computer that you are going to connect to via the remote desktop.
Now, in order to use remote desktop connection, you have to first open the app and make some initial set up.
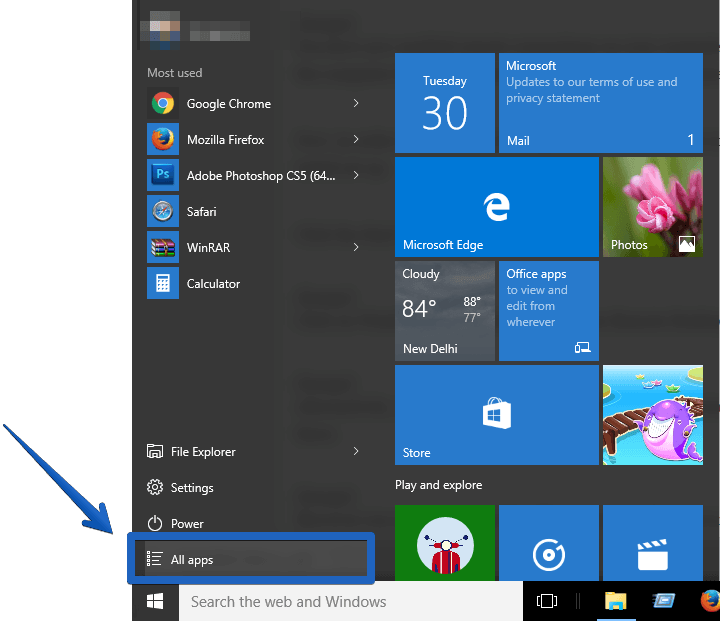
Click the Start button, and click on All Apps tab.
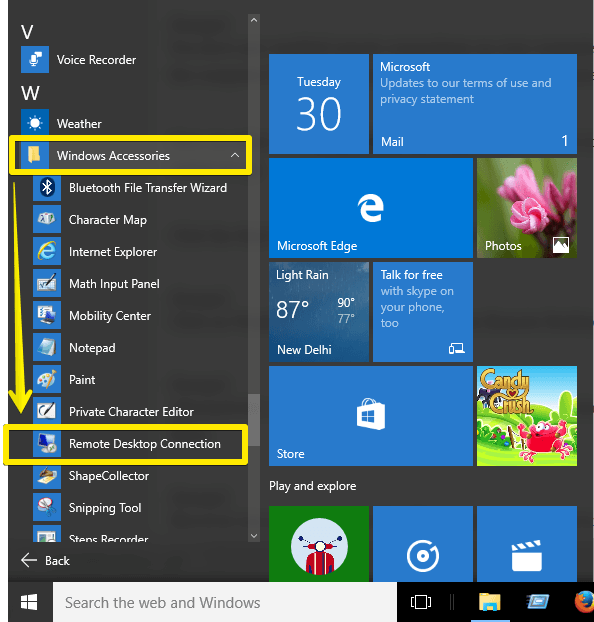
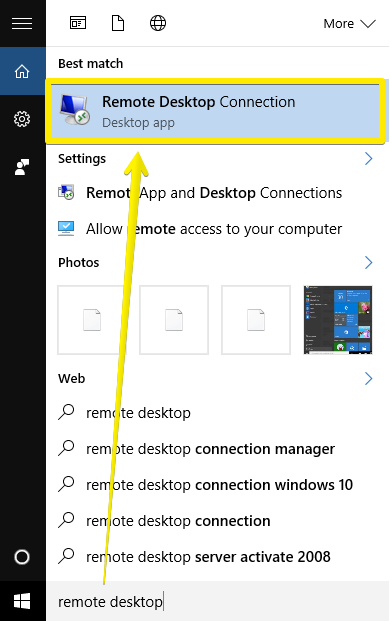
Click on Windows Accessories and you’ll see Remote Desktop Connection as shown below.
Alternatively, you can also type in “remote desktop” in Cortana search and start the app from there.
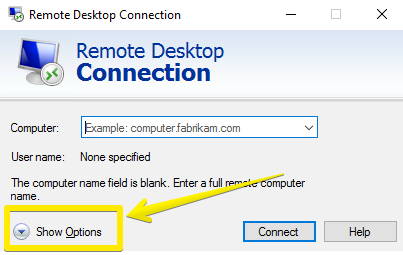
However you open it, expand the “Show Options” drop down.
You just have to type in the name of the computer you are going to connect to and its username in the General tab.
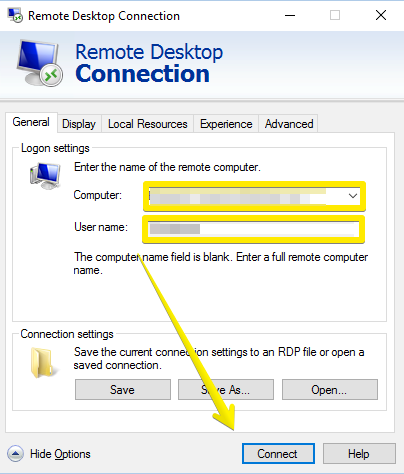
If you don’t know the name you can find it in the System Properties of the remote computer.
If you have problems connecting with username, you can also specify the IP of the remote computer.
The rest of the tabs are for customization and convenience.
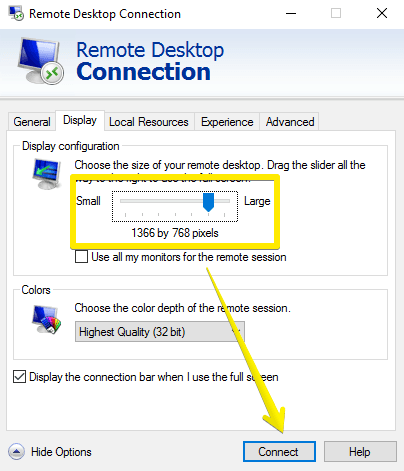
In the display tab, you can adjust screen size and color depth.
The Local Resources tab will let you adjust audio, keyboard and device settings.
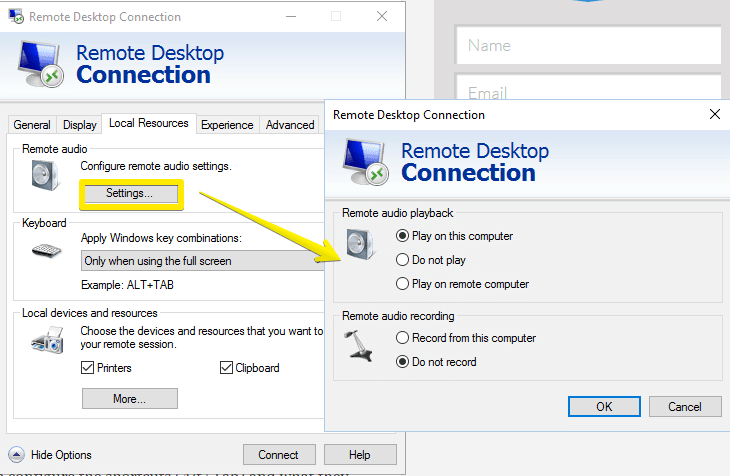
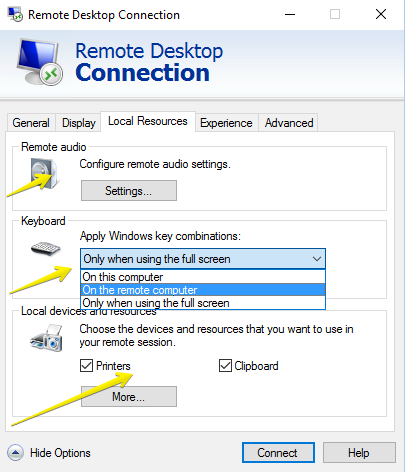
Especially in the keyboard section, you can configure the shortcuts (Alt+Tab) and what they mean for your convenience.
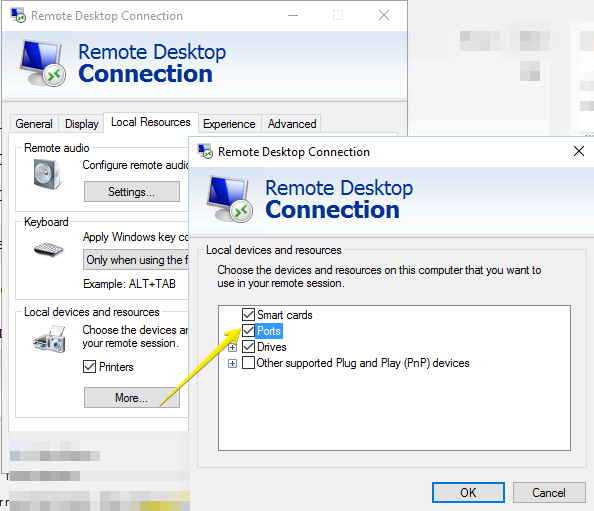
Clicking on the “More” button under Local devices and resources, you can configure the sharing settings - as to what folders you will use/share with the remote computer.
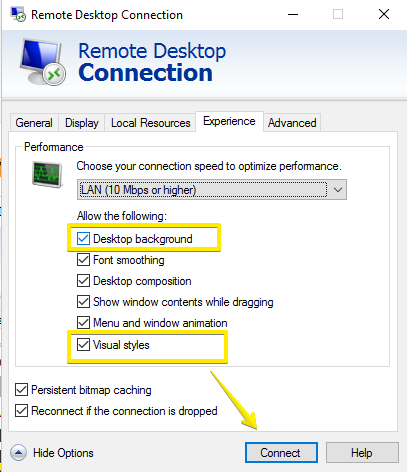
A remote desktop connection can be slow (and annoying to work with) - so you might want to disable certain features to improve performance.
You can do that in the Experience tab - You can enable/disable Desktop background, visual styles etc.
The Advanced tab is about additional options relating to authentication. It is better to choose either “Warn me” or “Do not connect” if authentication fails.
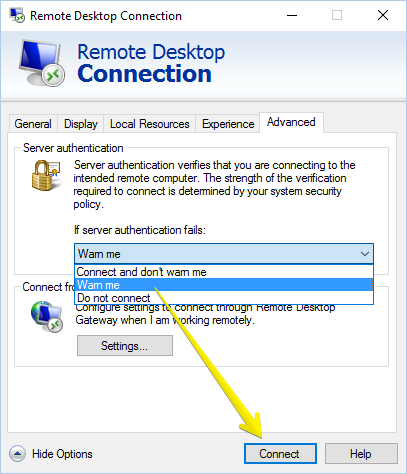
Under the “Connect from anywhere” option, you will need to enter the necessary details after consulting with your network admin - this is useful if you have to connect to a corporate network or a VPN (think connecting to your office computer from your home).
How to connect to another computer using remote desktop connection?
Once you’ve done everything, go to the “General” tab and click on Connect.

You will be presented with a series of warnings. Initially you’ll see “Do you trust this remote connection?” warning.
You will have to click on Connect (if you will be connecting to this computer often you can also check the “Don’t ask me again for connections to this computer”).
Now in the next window you will have to enter the password for the computer you are connecting to.
You might see a warning message saying that the server name on the certificate not matching the name of the computer you entered.
In that case, just verify the name of the computer - if you can recognize it, you can click “Yes”.
Voila! Now the remote machine is connected and you’ll see it in its own window.
If you click inside the Window or make it full screen, the keyboard and mouse focus will be shifted to the remote machine.
You can close the remote connection by simply closing the Window.
Reference: Microsoft Docs

