What is Hosts file and how to edit it in Windows and Mac?
If you are wondering what a hosts file is, then it is understandable that you are a novice in computer techniques.
But, not to worry, you can always learn to be a master.
And once you know what a hosts file is and what you can do with it, you would know that how much fun it is, when you can control the way you surf the internet.
What is hosts file?
Every website you browse has an IP address. When you enter a website name, say www.google.com, your browser refers to a file that has the IP address, which is very unique for every website, and then takes you to the particular site.
So, the file that keeps the list of the website domain name and its corresponding IP address is the hosts file.
Hosts file is a configuration file that exists in your computer’s OS and tells how your computer can browse websites in a network.
So ordinary it may sound, but when you know to edit hosts file, then you will find that you can actually control your system’s network activities.
How to edit hosts file?
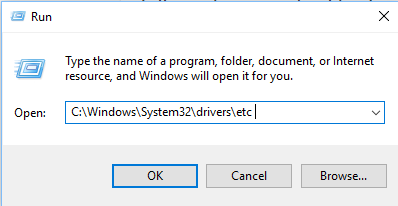
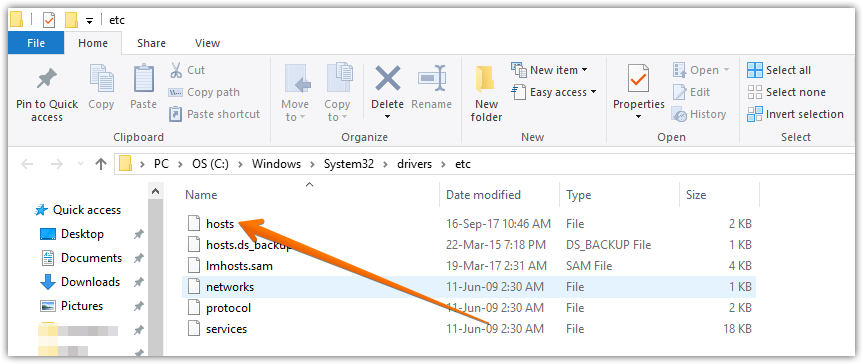
In Windows, you will find the hosts file in C:\Windows\System32\drivers\etc assuming C is the system drive where you have installed the OS.
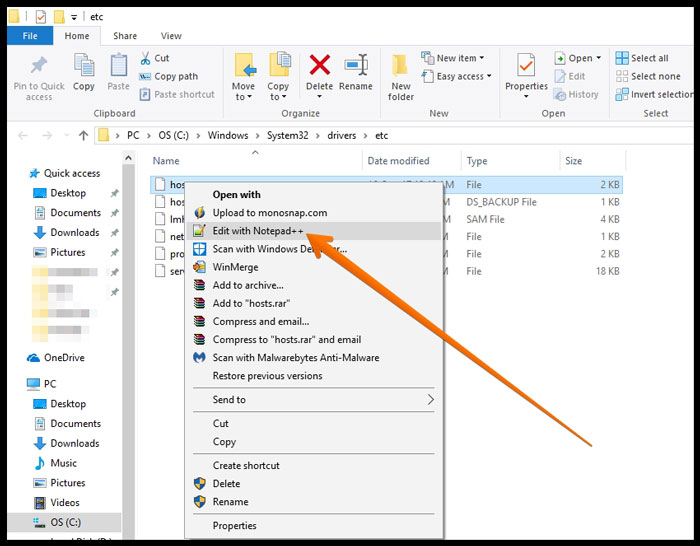
The hosts file has no file type and you can view it using a text editor, more commonly using notepad utility.
Once you view it, you can see that the file contains self-explanatory texts that will tell you, how you should enter an IP address.
Note that you need Administrator Permission to open it. So, run notepad as Administrator.
By manually inputting the IP addresses of websites, you can block those websites or redirect to a different website.
First to work with hosts files, you must know the IP addresses of the website.
To know the IP address:
- First, provide your computer with an internet connection.
- Now, open command prompt by typing cmd in the Run utility.
- By default, the prompt will be in User\Username\
- Type ping followed by a space, followed by a space, followed by the website for which you looking for the IP address.
For example,
ping www.google.com
Note the IP address that is returned by the command.
To edit the hosts file:
In notepad where you have opened, go to a new line, type the IP address correctly.
Leave at least one space and then give the domain name of the website. You can enter any number websites you want.
Just like this, 172.217.31.100 www.google .com
But always leave a line after you have done with your list.
Save your changes and note once again that to make changes to the hosts file you need administrator permission.
So, when you enter the website domain name, rather than referring the Domain Name Server, your browser will look for the IP address you have given in the hosts file. Isn’t this great?
What to do with a hosts file?
Okay, I can hear it. You still wonder what is great in editing the hosts file.
Let me tell you, you can block a website and just imagine how great it is.
Especially if you are a parent, you can prevent your kid from browsing restricted websites.
To block a website:
Just add the entry, 127.0.0.1 , followed by at least a single space and then the website domain name.
127.0.0.1 is a loop back and your browser will get tired of searching for the website with this particular loop back address, and will finally end up with ‘Error: Website not found’ message and something of this sort.
Just remember, the syntax is, 127.0.0.1 www.blocksite.com
To redirect to a different website:
Isn’t it fun when play prank with your friends? You cause a trouble with their system and only you know the trick to solve it.
Then when you resolve the problem, the kind of expression they will have on you, the technology geek.
Well, a little show – off, isn’t that fun.
Then let’s do it, a little prank. Make your friends wonder. Here’s what you can do.
If your friend has a homepage or a page he preferably often uses, make note of that website domain name.
Now, when he’s off for a cup of coffee, go to his hosts file, and edit it. Give a different IP address for his homepage.
The same syntax and that’s it.
Every time, he enters the website’s domain name in the browser, the browser will take him to an entirely different website, whose IP address you have entered, indeed.
He will wonder why and just then you can go and replace the correct IP address for his homepage.
As he wonders how you have done it, you can simply show off, “well, that was as easy as a child’s play”.
To prevent hijacking:
Ok, when you have read the previous idea, you must have realized that why you had been redirected to a different websites, instead of what you have mentioned.
This is called hijacking, taking you to an entirely different place.
A malware, that is able to edit your hosts file content, will replace the correct IP address with its own IP address.
Just by making your hosts file, Read Only, you can prevent the malwares from altering the contents of hosts file.
How to do all these in Mac OS?
The procedure is the same for any version of Mac OS. You will have to launch the terminal.
You can either use the launch pad, search for Terminal and open.
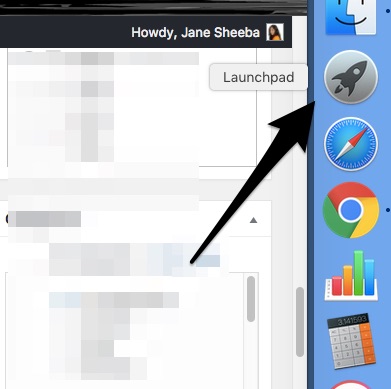
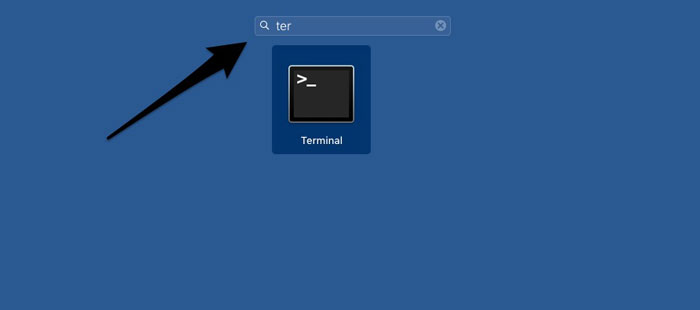
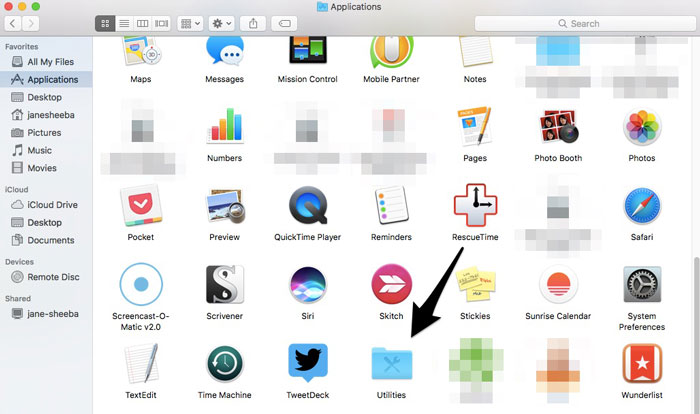
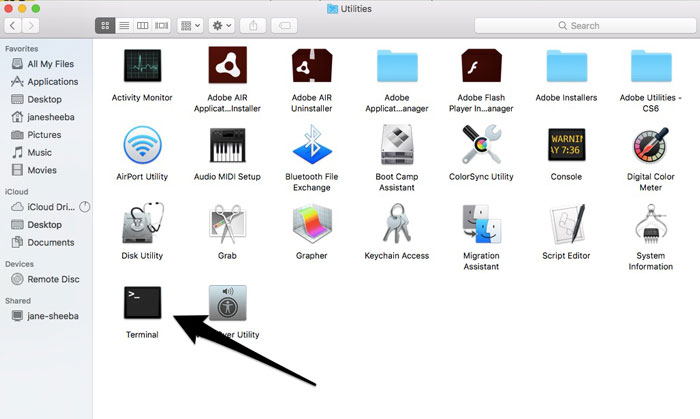
Or go to Applications in the Finder and click on Utilities. You will find the Terminal icon inside. Click it to launch the terminal.
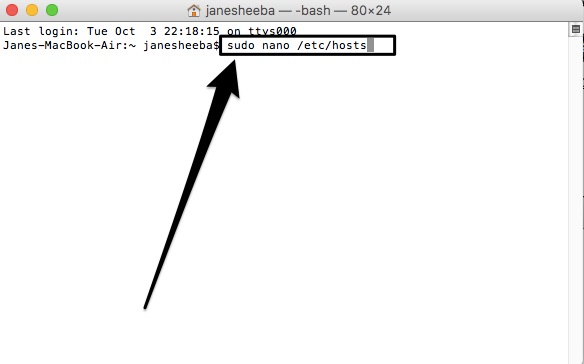
Type sudo nano /etc/hosts to open the hosts file.
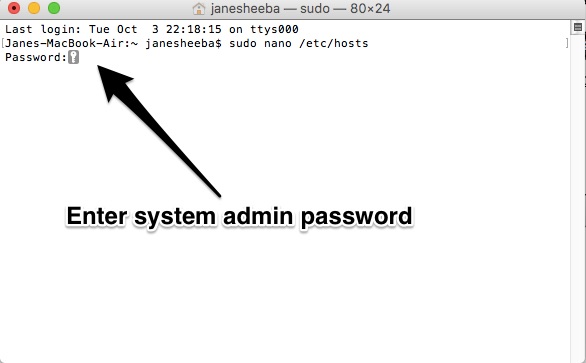
Enter your system admin password to open the hosts file.
- Now, it is as easy as editing any other file
- For loop-back, try using the IP address 0.0.0.0 to block any website.
You will see that the procedure is quite similar, only the way you open the hosts file differs.
In this guide, you have learnt something new, something advanced, quite easy but not explored.
Tell us how useful and fun was that. Also tell us if you had to do it in a different way.

